Office Chair Arm Adapater
creation date: 2025-03-08 01:03
modification date: 2025-03-08 01:03
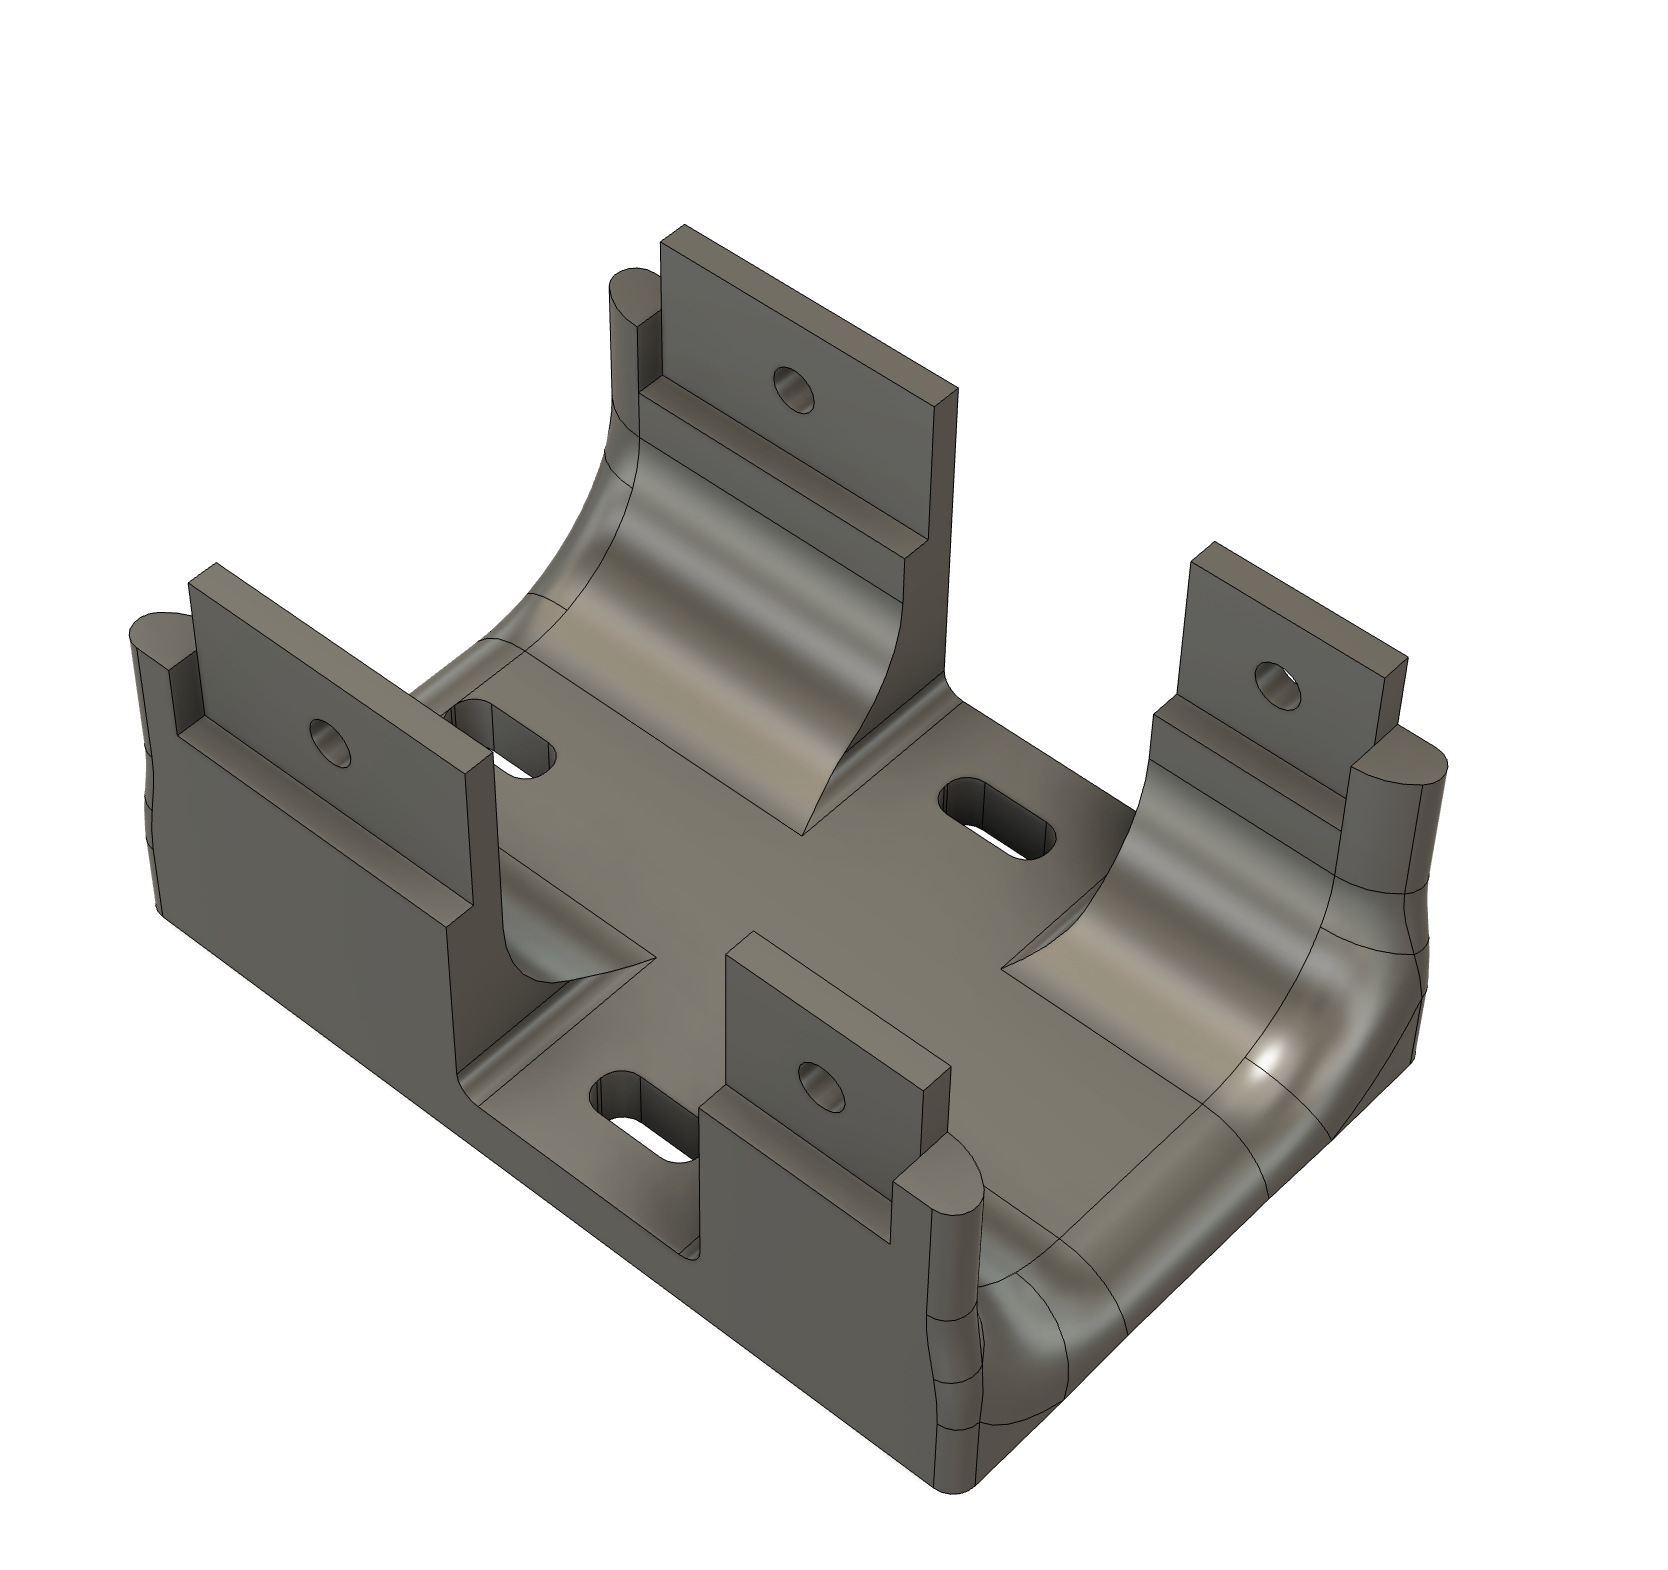
My office chair from aliexpress has very tall armrests that mess with my posture when I am typing. The plan is to print 2 of these to extend the arm chair down by 90mm so I drafted this bracket in Fusion 360 to 3d print:
![[office chair arm adapter.stl]]
{
"name": "office chair arm adapter.stl",
"showGuiOverlay": false,
"rotationX": 0, "rotationY": 0, "rotationZ": 0,
"AutorotateX": 0, "AutorotateY":0, "AutorotateZ": 0,
"positionX": 0.000, "positionY": 0.000, "positionZ": 0.000,
"scale": "0.05",
"stlColorHexString": "ff9500",
"stlWireframe":false,
"backgroundColorHexString": "add8e6",
"attachLightToCam": false,
"lightColor_AttachedCam": "FFFFFF",
"lightStrength_AttachedCam":1,
"lightColor": "FFFFFF",
"lightStrength":1,
"showLight":false,
"lightPosXYZ": [5,10,5],
"orthographic": false,
"camPosXYZ": [10.713940631501586,4.1292248465470776,-8.255966225180291],
"LookatXYZ": [0,0,0],
"showAxisHelper": true, "length": 10,
"showGridHelper": true, "gridSize": 10
}
I'm also trying out this new (to me) obsidian app - embed 3d. to embed the 3d models that I make or want to showcase. So far its pretty primitive.
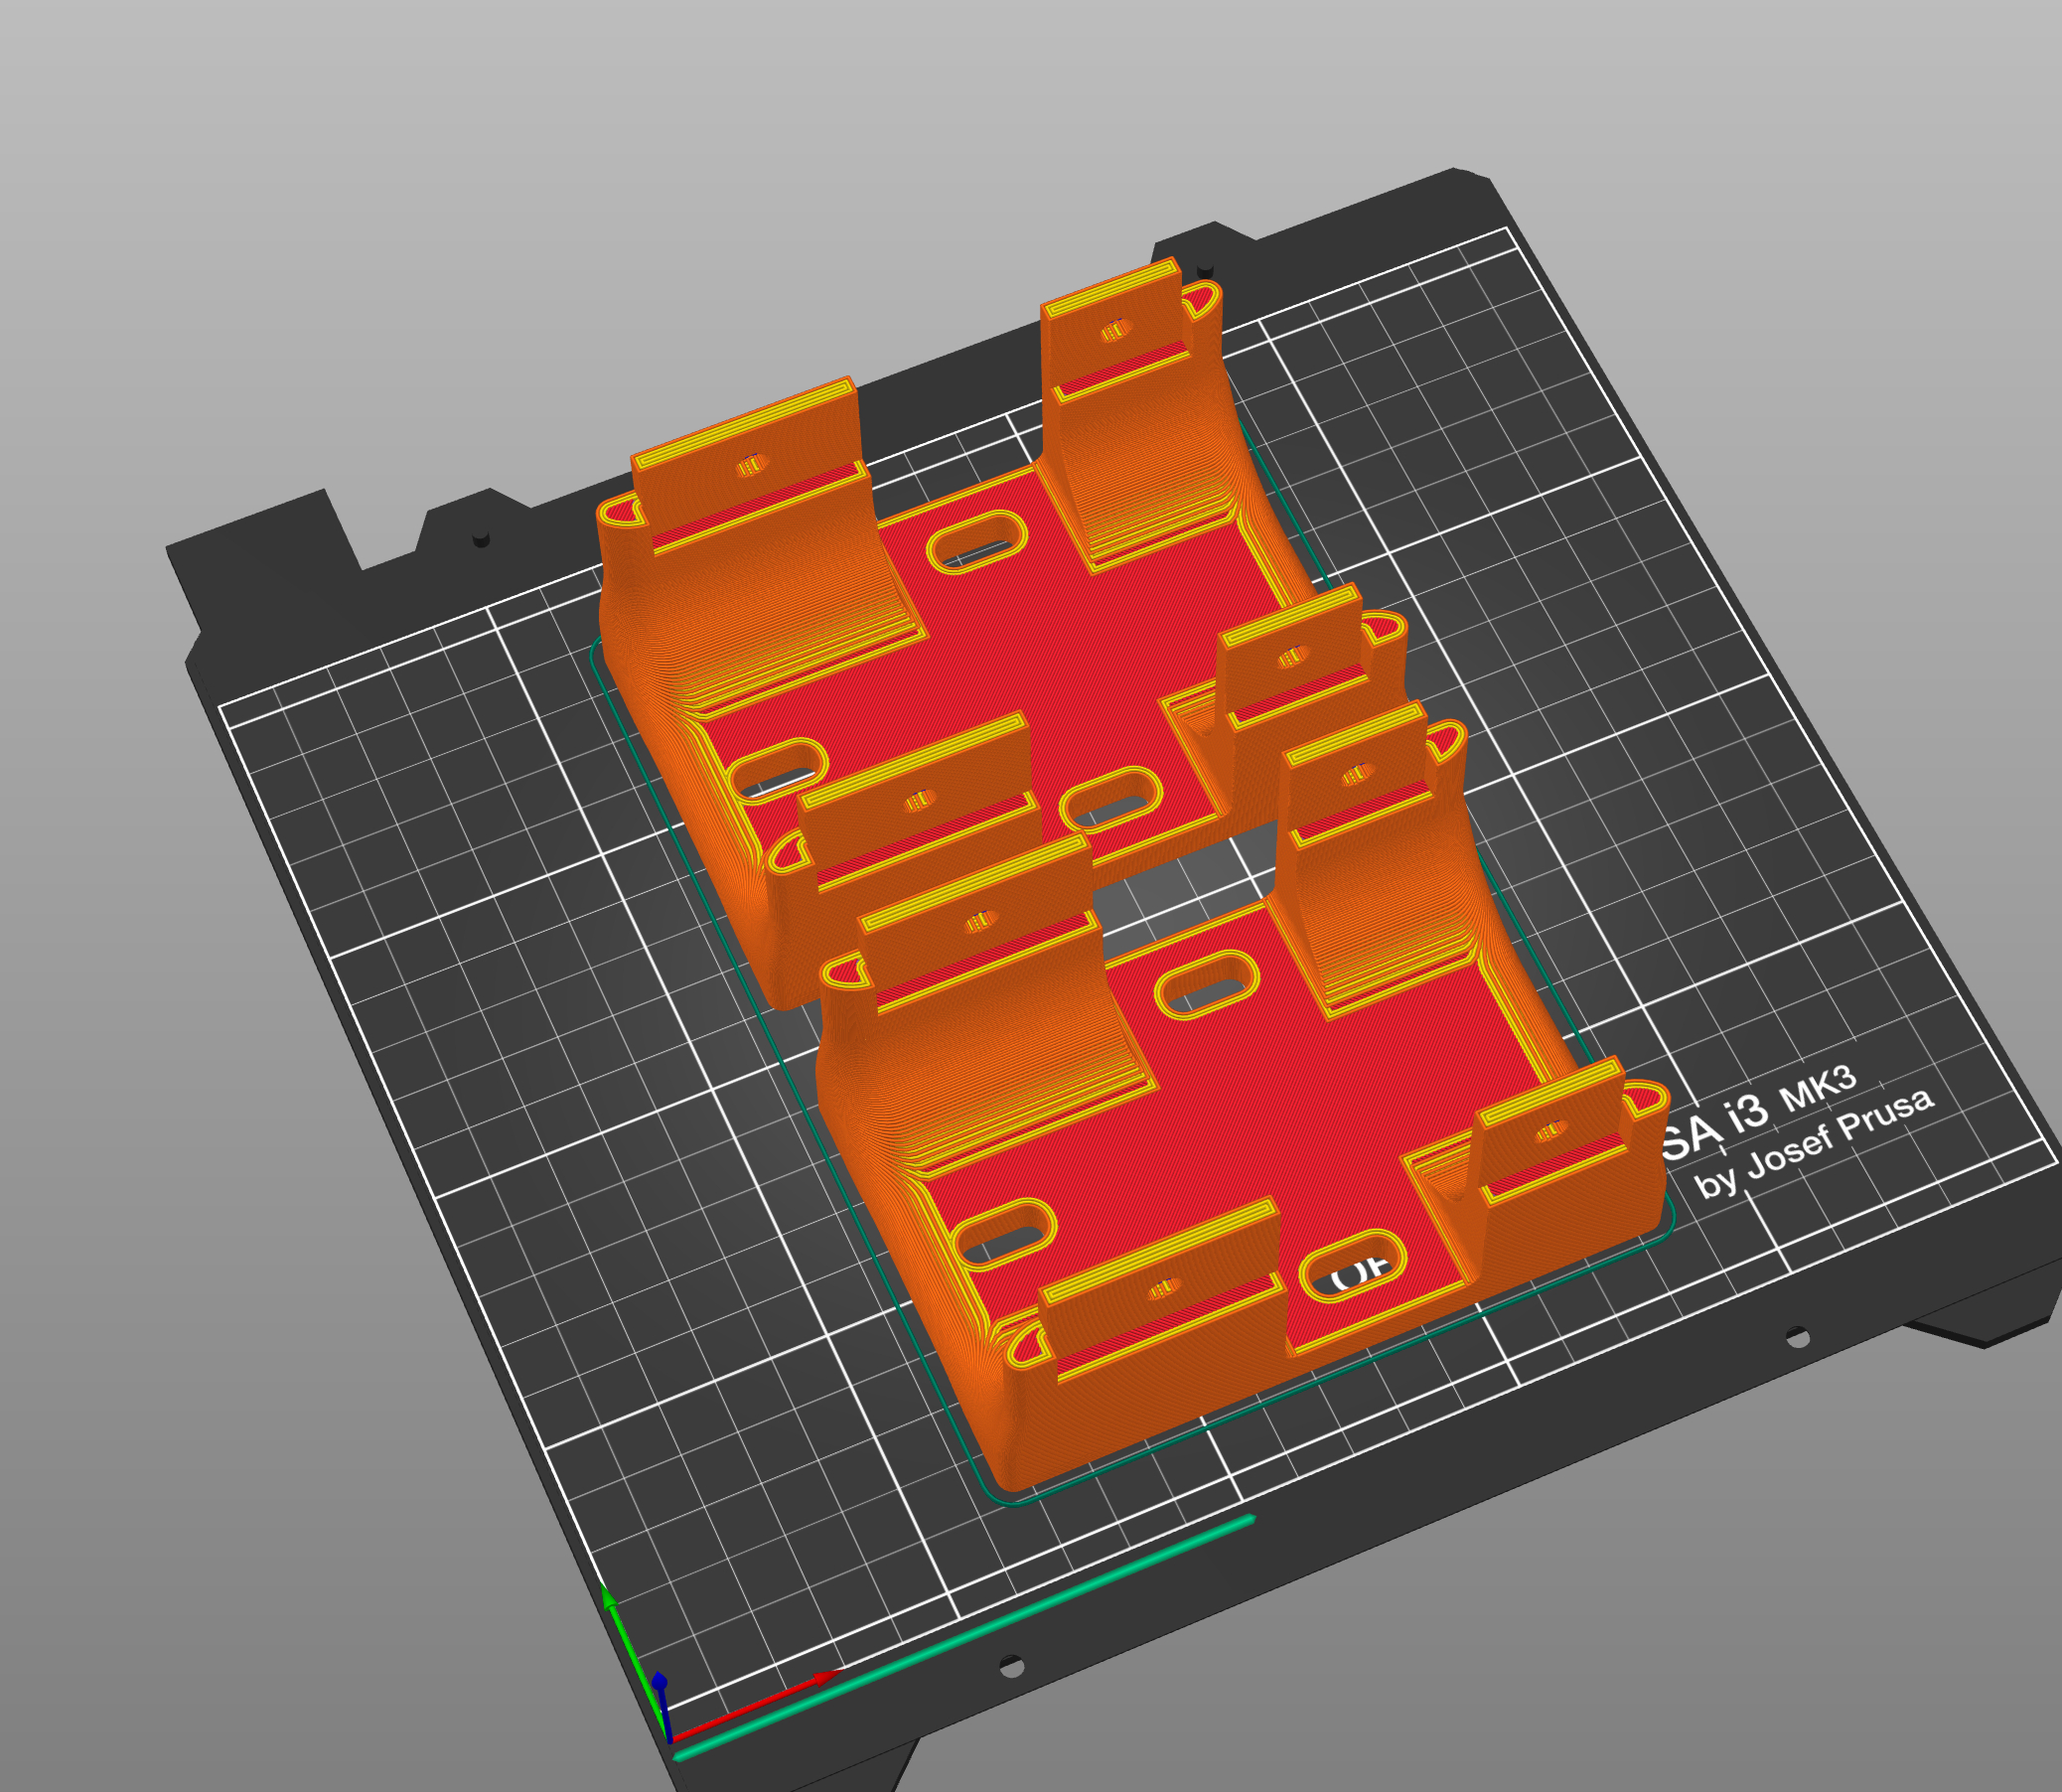
After seeing this in model in prusa slicer, i realized there is no good way to print this without supports. Investigating alternate print angles proved fruitless towards the same goal of printing with minimal supports.
I took v1 model and made a v2. i think magikarp is evolving !
Open: magikarp-pokémon-magikarp.gif

Splitting the model in half and making intersecting supports with holes for fasteners and were good as garados.
On top of that, I am trying out this other plugin called - image layout. so far its pretty neat. Here is an example of the "carousel layout"
---
layout: carousel
---
Open: Screenshot 2025-03-10 at 2.20.53 PM.png
Open: Screenshot 2025-03-10 at 2.20.35 PM.png
Andddddd it turns out v2 didnt work out. there is a leg rest section of the chair that slides in and out from under the seat with two long metal rods. The rods were obstructing the walls of this model by about 5mm. (because I didn't measure everything and just wung it ((winged it??)) like I usually do). Onto v3...
I ended up taking 15mm off just for the sake of saving plastic considering the v2 was a lot stronger than I anticipated with 3mm wall thickness and 30% cubic support infill. Printed with Creality PETG on the Prusa MK3s.
Open: Pasted image 20250311130416.png

Of course as I was assembling the adapters to the chair I realized that the recliner arm was in the way on the right side.
v2 will still work for the left side but I will need to remove and or move a section so that the recliner arm can still move with clearance.
---
layout: carousel
---
Open: Screenshot 2025-03-10 at 2.20.53 PM.png

Open: Screenshot 2025-03-10 at 2.20.35 PM.png
